
Why we created Alice
Not long after we started the development of the Livn API V2 it became clear that testing using Postman represented a headache due to the dynamic nature of the question/answer wizard-type booking flow.
We decided to create a small UI tool to simplify the process and that’s how the first version of "Alice" came into existence.
As we were using the application, we added more functionality, enabling us to explore and interrogate all aspects of the Livn API.
We thought that it would be great to have it as a publicly available tool to help new customers wanting to integrate with us.
How Alice benefits you
Simply put, Alice is a UI on top of our Livn V2 API, some of the core benefits:
- It will allow you to test the functionality of the API straight away without needing to write any code allowing you to understand the structure of the API much faster than just looking at the documentation and the JSON payloads.
- It allows you to easily test multiple different bookings giving you more details about the dynamic nature of the reservations.
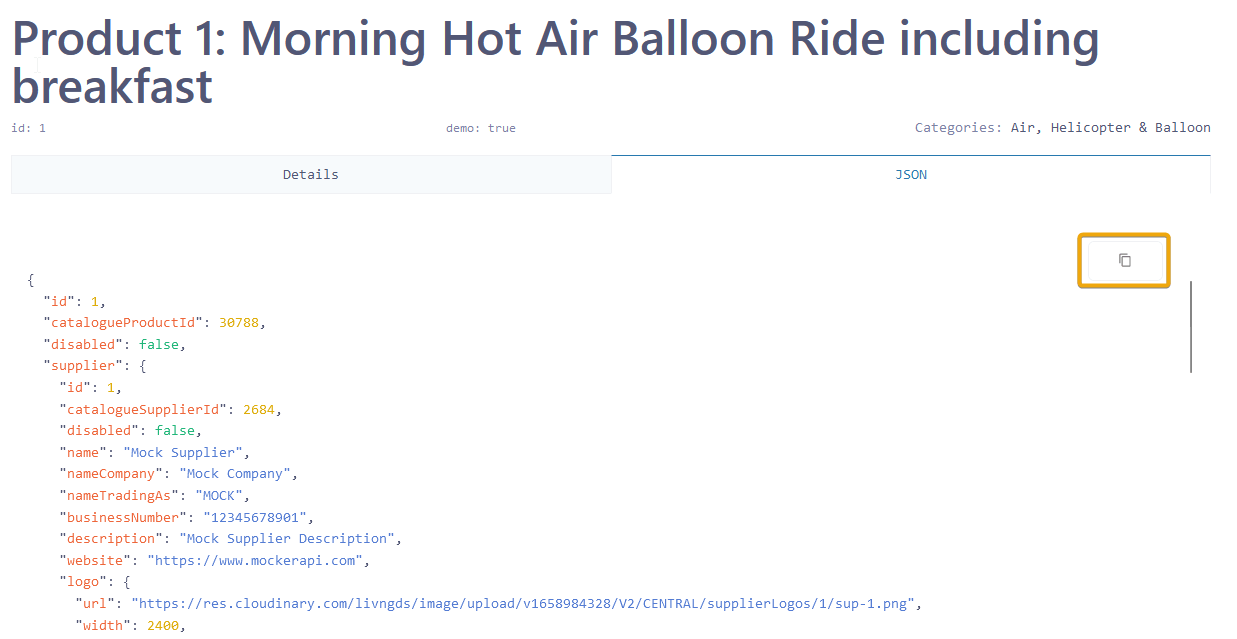
- The tool displays all the payloads for every step during the entire booking process, for all the important endpoints you’ll be able to see a side-by-side comparison of the rendered UI (details tab) vs the JSON payload. This is an example of get product by id endpoint:
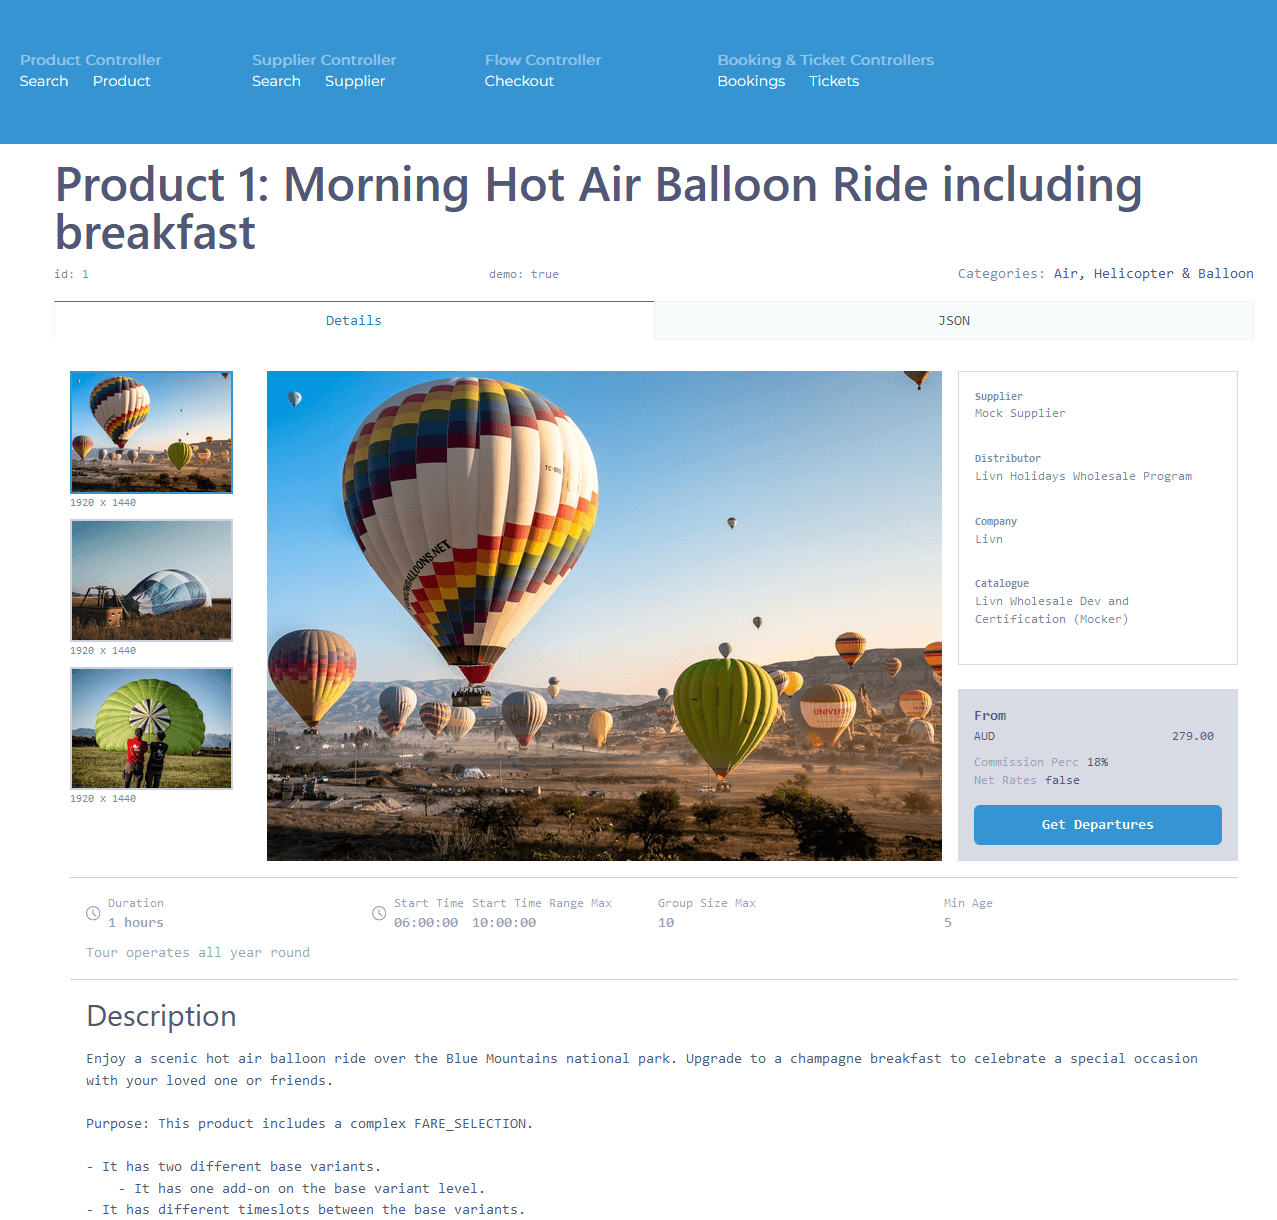

4. This dual view can help during development because it’ll give you visual feedback on how to interact with the API, big JSON payloads can be complex to read while having the UI rendered from the payload can help you to focus on the exact properties that you might want to display for your customers.
How to use Alice during development
In order to start using Alice, the first thing that you will need is to have handy your API user, after this please head to: https://alice.livnapi.com/login and make sure to use the following development sandbox satellite url: https://dev.livnapi.com

From here you will be taken to the product search page where you can see the product search functionality which provides different filters as seen in the animated image below.
The filters above are of course the same ones available in the swagger documentation.

The UI provides access to the most used controllers from the API and under each controller you can find some actions like “search”, “product” etc.

These actions represent the most used endpoints that are offered in the API, feel free to explore all of them and familiarize yourself with the UI.
One of the most useful elements of the UI are the JSON views for most of the controllers as seen below, they are very handy because you can see in real-time the payloads from the API and the rendered version of them, you can easily copy the entire payload via the provided copy button for further examination
How to make bookings
The heart of the API is what we call the checkout flow.
To start a booking you need to go to the flow controller and initiate a checkout by:
(1) selecting the date for the booking, (2) entering a product id, (3) posting the flow to the Livn API. From here the question/answer wizard will start.
Note: starting here, all the communication is live with the upstream reservation systems, no cached information is presented during the checkout flow.
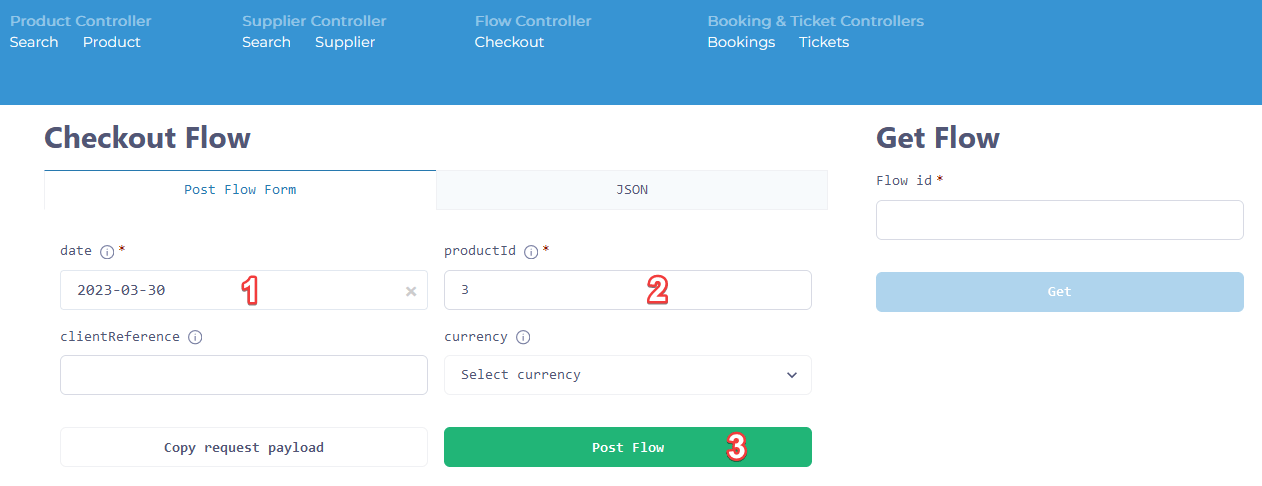
You can check the payload that will be sent to the API by clicking copy request payload
You’ll receive a flow object as the response.
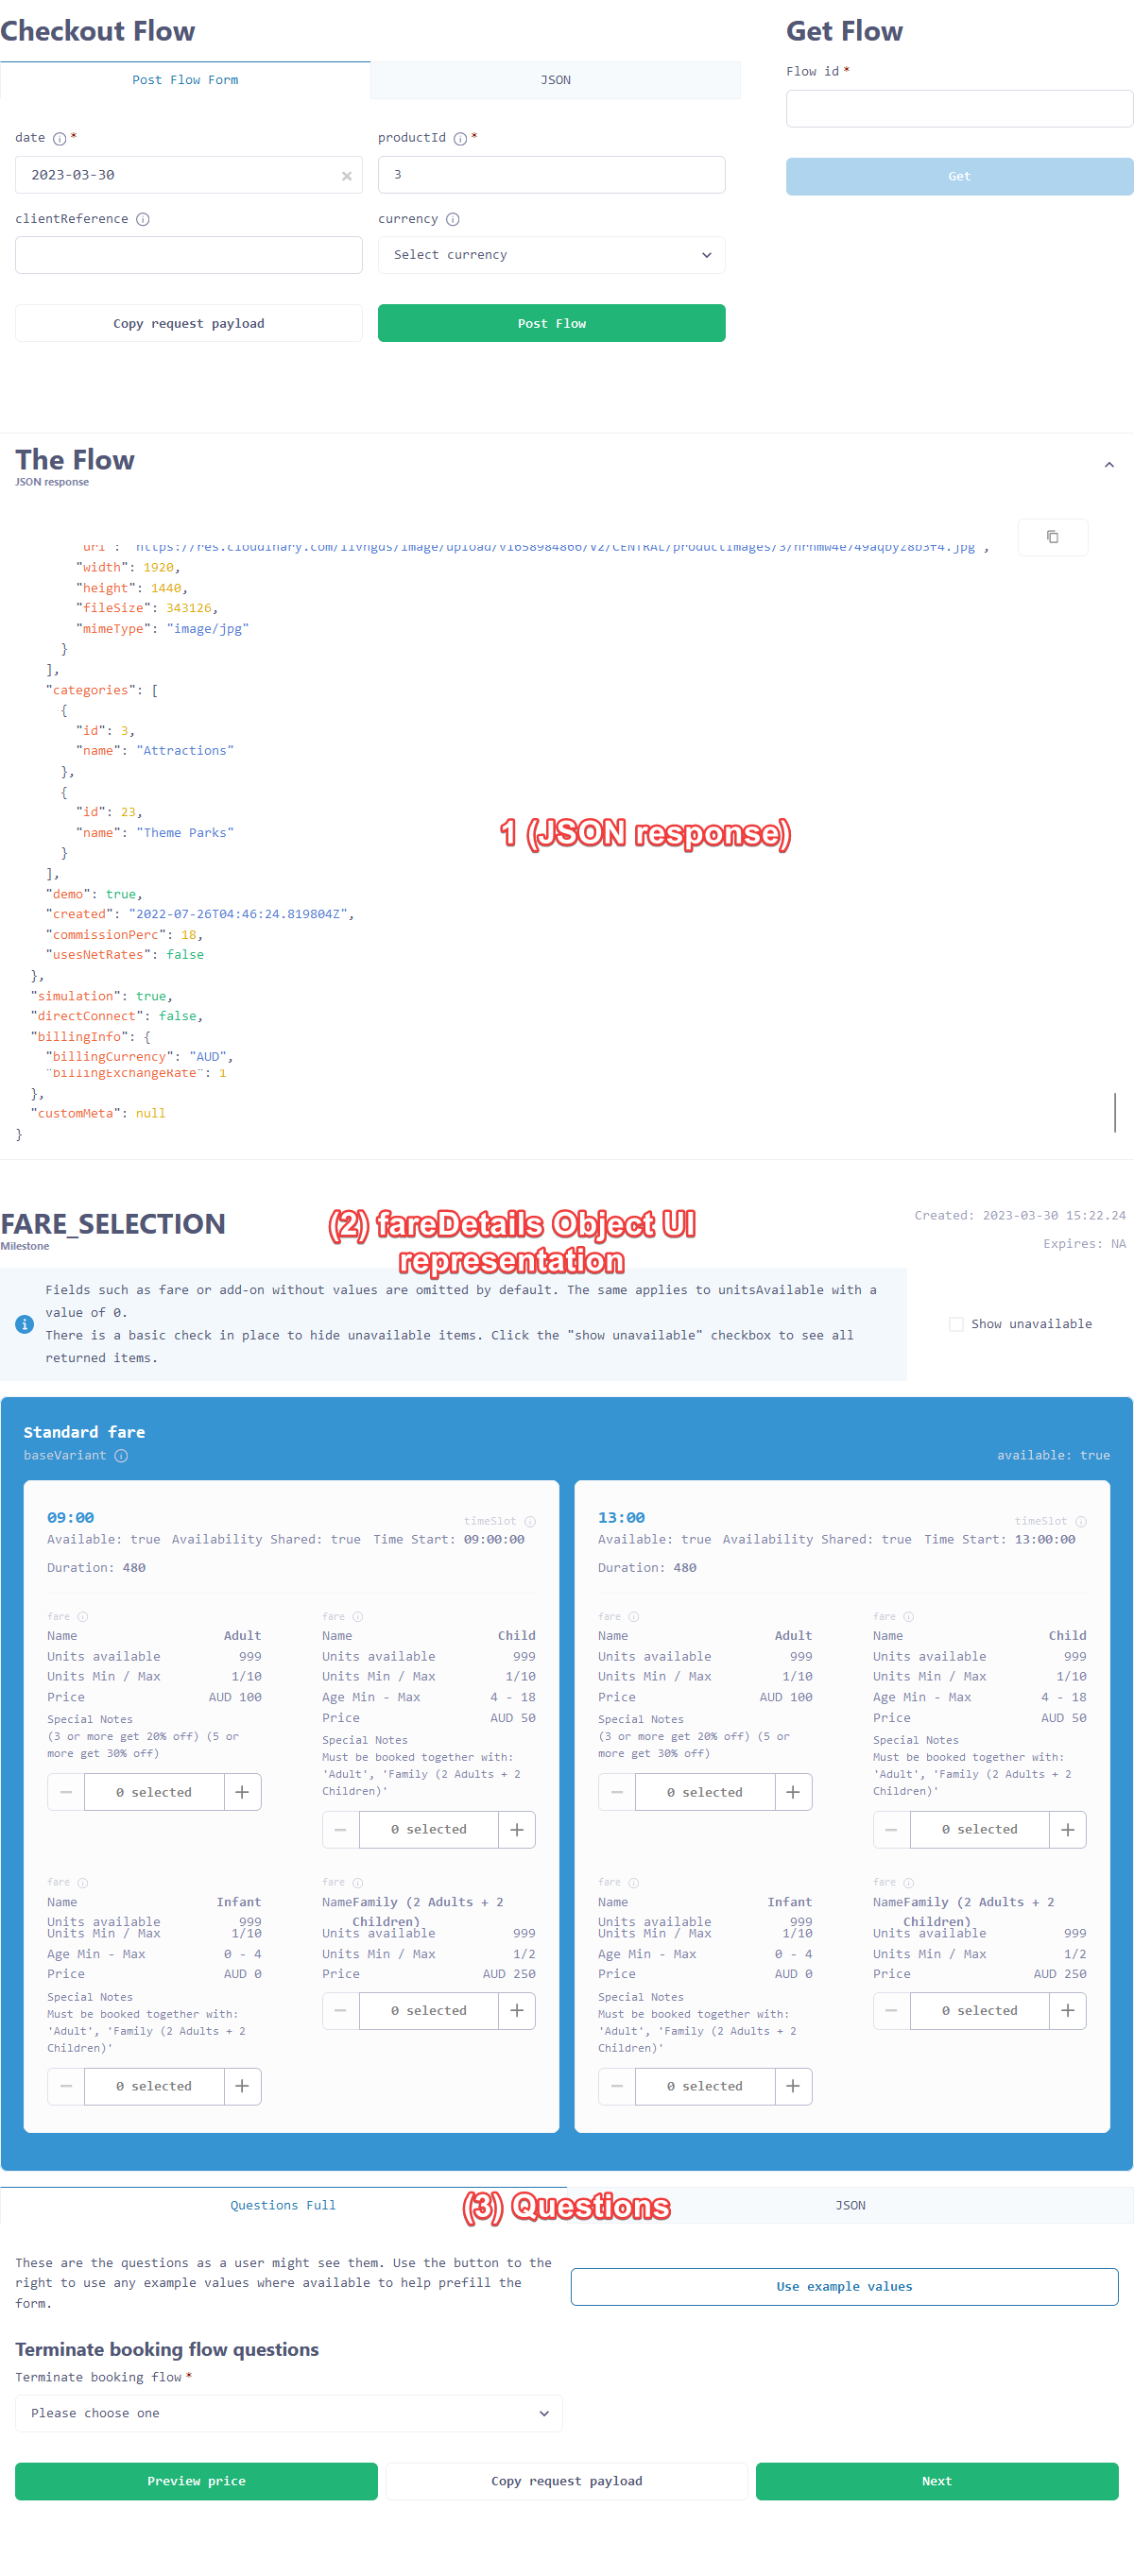
The response from the flow will contain the steps required to complete the booking and in this particular case, the first step is the fare selection with an optional question. For the questions, you can click the use example values button and it will populate all the answers for you, very useful when testing multiple bookings because it’ll save you from typing all the required information.
During the booking flow, you can check the price preview by clicking on the button and this will return the quote object with all the line items as seen below.
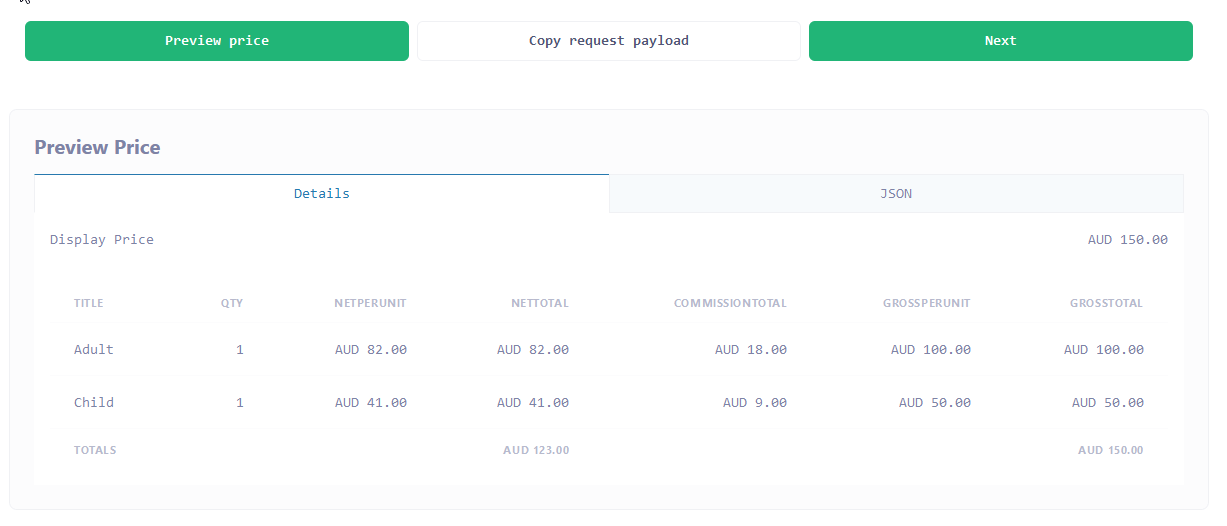
From here you just need to complete all the steps from the booking flow until you receive a confirmed booking.